.svg)
When creating a row of Cards or Flip Cards, it's a good idea to style the first card before duplicating, so that the same style settings (including height attributes) apply to all cards.
1. Set the height attribute
Cards: Fill Available Height
After creating a Card, select the Edit Current Element tab in the DesignPLUS Sidebar and choose Card as your active element. Then, in the Style panel, check the Fill Available Height box. This will ensure that all cards in the row are the same height, even if they have different amounts of content.
Flip Cards: Height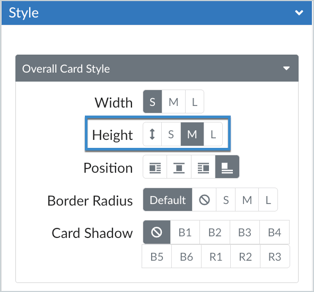
Flip Cards work a little differently than Cards: they have three preset heights that you can choose from. Once you have created a Flip Card, select the Edit Current Element tab and choose Flip Cards as your active element. Then, in the Style panel, select the Overall Card Style menu and choose a height of Small (200px), Medium (300px), or Large (400px).
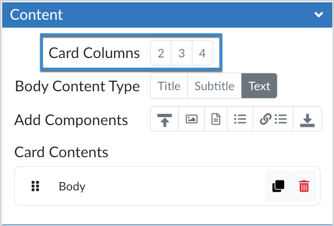
2. Create a row of Cards or Flip Cards
Now that you have adjusted the height of the first card, you can convert it into a row of identical cards using the Card Columns option, which appears in the Content panel when Card is the active element. The new cards will inherit the height setting that you applied to the first card. See the DesignPLUS User Guide for more information about creating a row of Cards or creating a row of Flip Cards.
Note: While using the DesignPLUS Sidebar, some visual elements may appear slightly different in the Rich Content Editor than they do on the published page. If the cards appear to be different sizes during editing, you can use the Preview Content tool to confirm that your layout displays as expected when published.